Best (and Worst) of 2012 Natural Beauty Products Resolution

Last January, I announced that my resolution for 2012 was to only buy organic or as-close-to-natural-as-possible beauty products. I had watched Annie Leonard’s “Story of Cosmetics” and gotten freaked out by the ingredients in my products. I also found EWG’s Skin Deep, which is a database that rates the safeness of beauty products. (Spoiler alert: even expensive, crunchy granola cosmetics can have bad ratings.) Throughout the year, I have been trying all sorts of new cosmetics with varying degrees of success. So this is it, my final report on the best and worst natural beauty products used by me in 2012.
| Product | EWG Skin Deep Hazard Rating | Review |
| Burt’s Bees Replenishing Lip Balm | Low | This stuff works. |
| Covergirl NatureLux Mascara | Moderate | Best mascara I have every owned. Doesn’t smudge or give me raccoon eyes. Ever. |
| EOS lip balm | Low | Was suspicious of the egg shape, but it’s actually really fun to use. Love it. |
| Garnier Fructis Pure Clean Conditioner | Moderate | Good smell. Haven’t used it long enough to be sure how I feel about it yet. |
| Kiss My Face Ultra Moisterizer | Moderate | Nice texture. Doesn’t feel greasy. |
| Lush Karma Solid Perfume | Moderate | Like the solid perfume idea, but it smells too much like incense and general hippiness. |
| Nature’s Gate lotion | Moderate | Meh. Works fine but not my fave. I like a thicker lotion consistency. |
| Organix Cherry Blossom Ginseng Conditioner | Moderate | NO! Their brand name is misleading–it’s not an organic product. Plus, the conditioner made my hair feel heavy and a little greasy. Wouldn’t buy again. |
| Sparitual Nail Polish | No Info | Love this polish. Wish there was more color selection. |
| Tate’s Odorless Nail Polish Remover | No Info | This stuff is magical. None of the toxic waste smell of normal polish remover. Costs a small fortune though, so use sparingly. |
| Tresemme Naturals Shampoo | Moderate | Works fine, but the scent changed slightly with time. (See below.) |
| Yes to Carrots Shampoo | Moderate | Same smell problem as Tresemme, but worse. Scent reminded me of a flea collar and had to throw the rest of it away. I loved it until it started to stink. |
.
I’ve definitely changed my routine in the beauty aisle this year. And although I’m not convinced that all of the products I have purchased are significantly safer than my old ones, I’m glad that as a consumer, the dollars in my beauty budget have “voted” for greener, cleaner products overall.
I hope this list helps if you chose to navigate the challenging and often deceiving terrain of natural beauty products. And if you have tried any other products that you LOVE, please tell me about them!
-Rachel
NYC New Year: A Weekend in Photos

I’ve had my fair share of lame New Year’s Eves with mom, dad, and a tv movie, but this year was not one of them. I had the pleasure of hosting three friends–Sam, Harry, and Meg–at my Brooklyn apartment. To be honest, I was a little nervous before everyone came, mostly because I was afraid of spending the whole weekend getting lost in Manhattan and secondly because I was afraid I would fail at conveying how cool my new home city is.

root beer float
We started off with dinner at Seraghina–my neighborhood hipster pizza place–on Saturday night. On Sunday, we began with a brisk (I’m using this word to mean cold) walk across Brooklyn Bridge, and a wander through SoHo, TriBeCa, and Greenwich Village with frequent pop-ins to shops (like Pearl River Mart) to warm up. We also scored our first free sample of the weekend–some super spicy hot cider outside Bubby’s–before ditching half hour wait for the warmth of the great indoors at Ivy Bistro a block away. That’s where we got our next free sample–christmas cookies made by “the host’s motha”.
On Monday morning, we headed straight to Tom’s Diner in Brooklyn, which had a line out the door and around the corner. Since we were in better spirits, we stuck it out and were rewarded with orange slices, french fries, and pancakes, handed out to us by Tom’s token friendly old man (named Gus) while we waited for a table. Sam got a gorgeous root beer float which came with extra root beer on the side.

bocce ball court
The most disappointing part of our trip was that the Brooklyn Botanic Garden and Brooklyn Museum were both closed on New Year’s Eve. Bummer. After strolling Brooklyn’s fifth ave and accepting our final free sample–champagne at Habit boutique–Harry suggested we enter the fray in Times Square, just to get a peek at the crazy. We took the train to Penn Station and walked 25 blocks through the midtown insanity to end at Central Park. It took quite a bit of effort to stick together, but it was fun. At the worst crowds, we had to link arms and shoulder through.
We went back to my apartment in Brooklyn to thaw out for a while before heading to Union Hall (bocce ball bar with fun music and a healthy hipsters:prepster ratio) and The Gate (standard neighborhood dive). The night ended with fireworks in Prospect Park.
I was happy that I was able to show my friends some true New York moments. I gained some confidence about my own ability to navigate New York and feel more prepared to entertain the rest of the visitors that will be arriving on my doorstep later this month!
-Rachel
(Photos, as usual, by Sam. Except the photo of Sam, which is by me, of course.)
 Meg being cold on the Brooklyn Bridge |
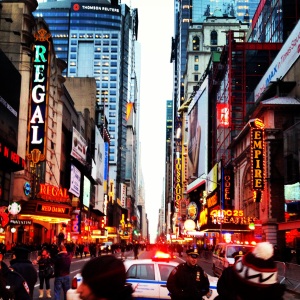 cops, crowds, and crazy light-up glasses |
Guest Post: Winter Workout Motivation
This guest post is written by my longtime friend, Brianne, who is a blogger and a fitness guru. She received her B.S. in Exercise Science and has experience in personal training and group fitness instructing. She recently started writing for Feather Magazine as a Health Writer.
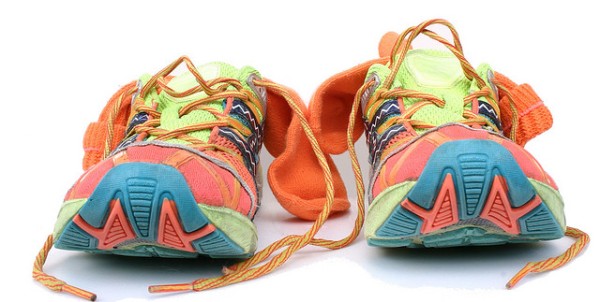
Photo by timtak on Flickr Creative Commons
Sometimes, even being the fitness guru I am, I get discouraged from working out because of the cold. To motivate myself, I usually crank my workout playlist, remember how I will feel afterwards, and know that if I don’t go workout, I will feel guilty. My favorite winter activity is alpine skiing. I may not be the best at it, but it is an excellent leg workout. Sometimes though, it’s hard to get to the mountains for an afternoon in the snow.
If you are one of those people who tend to gain weight during the winter due to lack of activity because of the cold weather, have no fear. Here are three reasons to get you going on your workout:
More Energy
Working out allows you to have more energy because you are putting stress on your body–a good type of stress. It tires you out which allows you to get the full night of sleep you need to recover, allowing you to be better rested in the morning. Also, the added stress means your body needs to adapt, giving you more energy.
Feeling Good
Working out releases endorphins which make you happier. It also makes you feel accomplished knowing you just did a workout that you didn’t know you could do before you started (or you didn’t really want to do.)
Accomplished
Lastly, you see gradual improvement in your time, effort needed, or weight lifted over days, weeks, or months You can be proud of your hard work and dedication! These all lead to a positive outlook on yourself. You don’t want to give up all this just because it’s colder!
Sam: Post Grad Life
 Since graduation this May, I have since moved back home to Syracuse and am enjoying life with my family. While it wasn’t my original plan, it has proved to be beneficial. For one, I get to save a lot of money, which is handy since I am still trying to figure out what I want to do with life and just found a job this week! I am now a Human Resources Assistnat at Le Moyne College here in syracuse. I’ve made it through my first week and am still feeling great! I couldn’t have asked for a better place to start my career path to top notch head hunter preferably in the gaming industry. ( I just cant imagine life not surrounded by gamers anymore thanks to Champlain.)
When I wasn’t scavenger hunting for jobs on the interwebs these past few months, I was crafting and refinishing furniture. Its been nice to have the free time to do some of the bigger crafts I’ve been dreaming of for a while and take advantage of the tools and space my parents have. It has been a little tough giving up all my own space but have worked hard to make my room and basement (/party room) my own. (I will miss it when I am gone mom and dad!) Keeping photos of my friends and Harry around help a lot with the distance because I still get to see them everyday 🙂
My projects have given me something to do and kept me focused on big picture goals. Some of my favorite projects I’ve done since being home are my potting bench and jewelry organizer. Normally my plants are outside enjoying the fresh air and sunshine but as per usual Syracuse weather gets too nasty for plants so I had to find a place for them inside where they could get some sun. I took some wood from some pallets we had laying around and drew up a plan and got to work with some help from my dad. I think it turned out great, definitely serves its purpose. I might add some hooks in the front to hang things like gloves, shovels, that sort of thing.
As for the jewelry organizer, it is made out of a type tray I found at the Syracuse Antique Exchange (there are four floors of amazing things in there!) It was gross when I got to it and was suffering from smoke damage so I took it home, cleaned it really well, which proved to be more time consuming then I originally thought, put a fresh coat of stain on it, and added some cork to a few squares to hang earrings on. They sell similar products on Etsy, but they were a little too expensive for my tiny budget so if you have access to an old type tray it is definitely worth the time to make it yourself.
List of projects shown below :
Top Row- Jewelry Organizer , Stack of wood I’m saving for future crafts, Plant stand
Bottom Row – Party room which includes- beer cap table, nifty light, refinished dresser. In process- reupholstering the orange love seat.
  |
 |
 |
  |
I have this stack of wood I’ve been saving for a craft project, but I have no idea what to do with it. (pictured above center) Any ideas?
Also if there is ever anything on here that you would like to make yourself and need more info from us on how to do so please ask we would love to help you out.
-Sam
Candle from a Bottle

- glass bottle
- glass cutter
- hot water
- cold water
- candle wax
1. Lightly score the bottle with the glass cutter.
2. Pour boiling water over the bottle making sure to only heat up the area around the score marks.
3. Quickly run the bottle under cold water. The glass will crack when it’s ready. If necessary, pour more hot water and repeat until you hear it crack.
4. Apply a little pressure and the two piece will separate.
5. Sand down the sharp edges.
6. Now you can use them as drinking glasses or fill them with candle wax and make candles.
Sam’s note:
I use the wax I have leftover in old candles to fill them.
-Sam
Beer Cap Table tutorial

After just over a year of saving bottle caps the table is complete!
Step 1. FInd a cheap table.
Step 2. Make sure the table is clean and ready to go. the particular table I started with was a very tall ugly kitchen table and i was looking to make a coffe table. so i first scraped off the interesting aztec college and chopped down the legs so they were good coffe table height and sanded off the glue.


Step 3. Make a Frame for the table (optional). i’ve seen this step done a few different ways with temporary borders or permeant ones so make sure you take the time to figure out what works best for you. I choose to do a permeant border. When making the frame for the table make sure you leave enough space for a layer of epoxy over the bottle caps that will level with the top of your frame. Then nail the frame in place.
Step 4. Seal up any cracks in the table to avoid air bubbles and leakage in later steps. I used wood glue and let it dry over night.
Step 5. Then paint it what ever color you would like.


Step 6. Lay out your design if you choose to go that route or lay them out randomly what ever you like the looks of best.
Step 7. Glue the caps down! I did not do this step and while my table came out just fine then next step was a little more stressful then it needed to be. If you skip this step like i did make sure you have something small like wooden sticks to push the caps back down because they will start to float when you pour the epoxy.
Step 8. pour the epoxy. the mixing ratios are going to be different depending on the brand you buy so make sure to carefully read the instructions and have everything ready. do it in a dust and bug free area so nothing falls in while its drying. i have one tiny little bug in mine that will be there forever now 😦


Step 9. let it dry then move it in to place and enjoy.
helpful tips for getting rid of the air bubbles:
- have a hair dryer ready to help get rid of the small air bubbles as the epoxy begins to set up
- hold a sander with out any sandpaper or anything on it on the under side of the table and let it shake the air bubbles out.
- use a squeegee to help level out the epoxy when you first pour it and help eliminate any bubbles

The Big Move
It’s official: I will no longer be a visitor to Brooklyn (as I was this week;) I’ll be a resident! In 15 days, I’ll be packing up a gargantuan duffel bag of stuff, heaving it onto a Megabus, and shipping myself off to NYC to become a hipster Brooklynite and next-door-neighbor to my big sister, Rebecca (and brother-in-law, Matt.)
It feels like a grown-up version of going to college freshman year. I have to figure out all the silly, annoying stuff, like how to get to the post office, and all the big, important stuff, like how to make friends. Unfortunately, there will be no orientation activities pre-arranged for me (aside from those by my sister,) but I’m looking forward to tackling the big city. In fact, once I become less than 100% terrified of riding my bike on the city streets, I’ll probably enjoy myself.
 |
 |
 |
 |
Photos are of the Brooklyn Botanical Garden (left side,) an Egg Cream at Tom’s Diner, and The Met.
-Rachel
Pallet garden update
It has been a very hot summer this year and keeping my planets alive has been especially tough since I got a job but my garden is doing well. I hade just enough lettuce survive the heat to make a tasty salads for a few lunches. A nice home grown lunch definitely helps get through the 9-5 day. My pomegranate plant on the other hand has seen some better days but with a little extra love I’m sure I can get it looking lively again.

Stayed tuned to see what awesome things Sam does with this ugly table!

Traveling Girl
Since June 1st, I have spent two weeks in Maine, one week in Vermont, one week in New York, four days in Massachusetts, and then returned to Maine (before I head off to Vermont again.) The best part of all my traveling is that I have been able to spend quality time my friends and family around the northeast. During my time on the road, I’ve had a ton of fun and adventures (including figuring out the New York City subway system,) but I’ve also learned a couple lessons on traveling.
 |
 |
 |
 |
Lessons learned from a month on the road:
1. Invest in luggage that you love. Mine was a four-wheeled pink, yellow, and orange zebra-print suitcase from TJ Maxx. It has held up rolling along miles of sidewalk and clunking down flights of stairs. Plus, I always feel warm and fuzzy when I unzip it to find all of my neatly folded clothes and organized items set up in the different compartments.
2. Pack a variety of your favorite clothes and plenty of underwear. I experienced all types of weather–from torrential rain to 100 degree heat–over the past month, and for the most part I was prepared for all of it. I packed a rain jacked, my favorite skirt/shorts/jeans/dress jeans and a variety of tops, plus sneakers and sandals. The only thing I wish I had packed more of? Underwear and shirts….I went through a lot of them during the heat wave. I also packed quarters and a baggie of laundry detergent to wash clothes on the road.
3. When arriving at a destination, be upfront about what you need/want to do while there. A week seems like a long time, but it’ll fly by. I had to prioritize finishing my 40 hours of work each week, but also fun outings like the beach, restaurants, and running a trail race in Vermont.
4. Take pleasure in the grandiose and the simple pleasures. Of course, the excitement of being in a mildly-exotic location means there will be eating out, sightseeing, and general adventuring. But some of my favorite times over the past few weeks were trips to the grocery store, watering the plants, and gossiping on the couch. Make time for the simple pleasures on long trips; it keeps the day grounded.
5. Find a home away from home away from home. Since I was staying with friends and family for a week (or more) at a time, I had to make some time to give myself (and my hosts) a break. While in Burlington, I went out for the afternoon to have my watch resized and get my nails done. When in New York, I made the Oasis Cafe my home away from home. It wasn’t a fancy or special cafe, but the drinks were cheap and it was only a couple blocks away from my sister’s apartment. During the heat wave, I made the cafe my refuge to cool off and get some work done in comfort.
See you all on the road!
-Rachel
Strawberry Jam


